Bounty scones

If you were stranded on a dessert island, you’d have these scones. With coconut and a cup of Java.

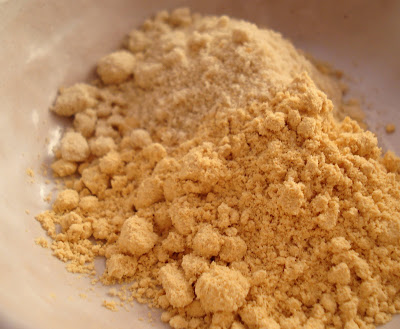
Cane sugar. Replace butter and milk by coconut cream and milk (from a can). Add dry coconut powder. For the rest, the recipe is like basic scones.

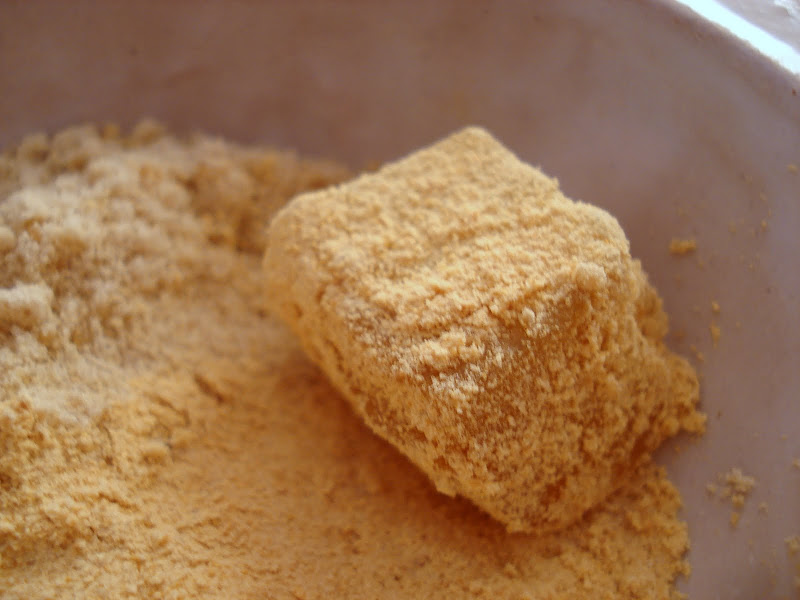
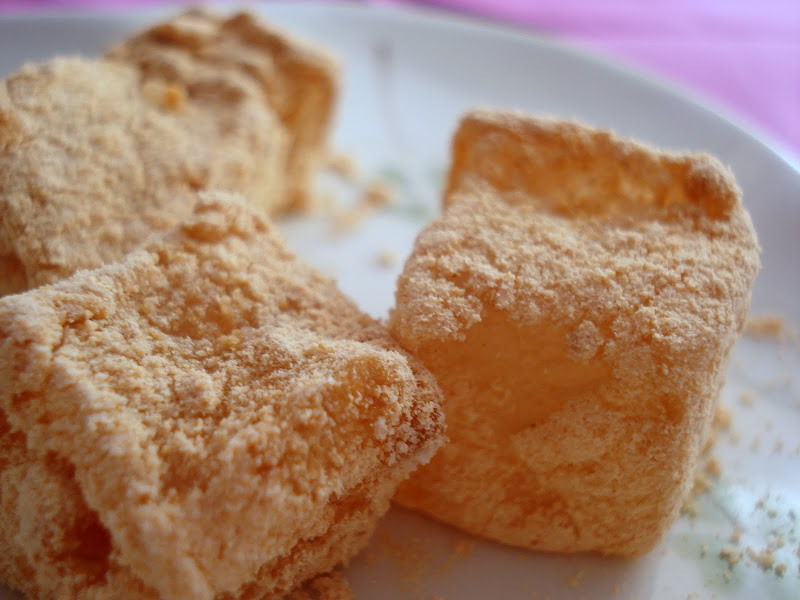
They didn’t rise much, but they expanded on all sides.
The inside is very soft, not mushy and grainy as the coconut bits didn’t “melt” into the flour.

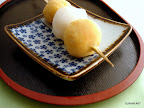
I simply ate them with more coconut powder and raw kinkan (kumquats) that grow locally and are in full season.

Basic Scones (a.k.a. Basic Biscuits) Source Audax Artiflex’s recipe. Daring Baker’s Challenge.

Servings: about eight 2-inch (5 cm) scones or five 3-inch (7½ cm) scones
Can be doubled
Ingredients
1 cup (240 ml) (140 gm/5 oz) plain (all-purpose) flour
2 teaspoons (10 ml) (10 gm) (1/3 oz) fresh baking powder
¼ teaspoon (1¼ ml) (1½ gm) salt
2 tablespoons (30 gm/1 oz) frozen grated butter (or a combination of lard and butter)
Approximately ½ cup (120 ml) cold milk
Optional 1 tablespoon milk, for glazing the tops of the scones
Directions:
1. Preheat oven to very hot 475°F/240°C/gas mark 9.
2. Triple sift the dry ingredients into a large bowl. (If your room temperature is very hot refrigerate the sifted ingredients until cold.)
3. Rub the frozen grated butter (or combination of fats) into the dry ingredients until it resembles very coarse bread crumbs with some pea-sized pieces if you want flaky scones or until it resembles coarse beach sand if you want tender scones.
4. Add nearly all of the liquid at once into the rubbed-in flour/fat mixture and mix until it just forms a sticky dough (add the remaining liquid if needed). The wetter the dough the lighter the scones (biscuits) will be!
5. Turn the dough out onto a lightly floured board, lightly flour the top of the dough. To achieve an even homogeneous crumb to your scones knead very gently about 4 or 5 times (do not press too firmly) the dough until it is smooth. To achieve a layered effect in your scones knead very gently once (do not press too firmly) then fold and turn the kneaded dough about 3 or 4 times until the dough has formed a smooth texture. (Use a floured plastic scraper to help you knead and/or fold and turn the dough if you wish.)
6. Pat or roll out the dough into a 6 inch by 4 inch rectangle by about ¾ inch thick (15¼ cm by 10 cm by 2 cm thick). Using a well-floured 2-inch (5 cm) scone cutter (biscuit cutter), stamp out without twisting six 2-inch (5 cm) rounds, gently reform the scraps into another ¾ inch (2 cm) layer and cut two more scones (these two scones will not raise as well as the others since the extra handling will slightly toughen the dough). Or use a well-floured sharp knife to form squares or wedges as you desire.
7. Place the rounds just touching on a baking dish if you wish to have soft-sided scones or place the rounds spaced widely apart on the baking dish if you wish to have crisp-sided scones. Glaze the tops with milk if you want a golden colour on your scones or lightly flour if you want a more traditional look to your scones.
8. Bake in the preheated very hot oven for about 10 minutes (check at 8 minutes since home ovens at these high temperatures are very unreliable) until the scones are well risen and are lightly coloured on the tops. The scones are ready when the sides are set.
9. Immediately place onto cooling rack to stop the cooking process, serve while still warm.

Tea du jour : oat cinnamon scones with mango

Rustic scones with spicy sweetness. That’s a healthy version, perfect for a week-day tea.

Divine with mango raw jam.

Easy like a scone.

Whisk together powdered oatmeal, about half the same volume amount of flour, a little baking powder, a pinch of salt, Ceylon cinnamon. Pour a few tbs of olive oil, whisk to get a sandy texture. Add water to get a very gooey mix, stir with the spoon. Stir in a few oat meal flakes. Drop on a floured dish. Turn 2 or 3 times to get a layer of 2 cm of thickness, spread a few more flakes on top. Cut scones with a knife and put them on a baking sheet (no need to grease it).

Bake 10~12 minutes at about 200 C. When they are cooked, the crust is hard and makes a hollow sound when you tick it with a nail. Spread lots of cinnamon and a little nutmeg on top. Serve warm.

If you don’t care about the shape, you can make some small rounds of dough with the spoon.
You can make them gluten free, if you don’t add flour. That works too.

Texture of a soft moist bread. The crust is not hard like bread but slightly crispy.

The mango “raw jam” is fresh mango pasted with a fork and revived with a little lemon juice.

Scones for tea…

Tea is served. With scones, confiture de questche (plum preserve) and clotted …ahem… yogurt.

Why scones ? Because :

Audax Artifex was our January 2012 Daring Bakers’ host. Aud worked tirelessly to master light and fluffy scones (a/k/a biscuits) to help us create delicious and perfect batches in our own kitchens!

Go there to see the other daring bakers’ scones and incredible research on the techniques that Audax made for us.

First I made 2 : plain scones for “cream tea” decorated with rose petals, and short scones.

In the following posts, you will see variations I tried :

veggie (lard) biscuits,
oat (olive oil) scones, coconut (milk, cream, flakes) scones

I followed the recipe using yogurt “buttermilk”. It seems there is no buttermilk nor sour milk sold in this country. They don’t need, as they have “calpis“.
I strained a yogurt, the liquid is to make the scones, the “cream” to eat on them. We can buy Japanese clotted cream in department stores.

That’s not the first time I made scones, not the hundredth time… I have no British origins, for what we know, but all gourmandes of the world now that quick cake. To make them quickly with minimal mess I do it all on a tray. I cut the butter into the flour with a heavy knife. Mix it all and spread on the same surface. With the hands I form a crepe ? a bannock ? and cut out scones. Then clean the tray and knife while they are in the oven.

The plain scones according to the recipe below. I had to lower quickly the temperature of the oven to 200 C. Otherwise they would have melted then burnt. That may depends on the oven.

“Short scones” are short-bread scones, softy short-bread. No baking powder nor soda nor eggs. Don’t kneed nor folded them, otherwise they would become too hard. Make balls of soft moist dough, and bake gently 180 C.

Inside :

(the rose scones)
If you want a flaky scone, that’s perfect. Follow the recipe at the end.

(the short scones)
Today they are not as good as usually. Baking them with the others was not great. They still taste great. There is not the least interference of a baking powder taste.

Served with my home-made Christmas tea that has fully developped its flavors.

Recipe from Audax (source and longest explanation)

Basic Scones (a.k.a. Basic Biscuits)
Servings: about eight 2-inch (5 cm) scones or five 3-inch (7½ cm) scones
Recipe can be doubled

Ingredients:
1 cup (240 ml) (140 gm/5 oz) plain (all-purpose) flour
2 teaspoons (10 ml) (10 gm) (⅓ oz) fresh baking powder
¼ teaspoon (1¼ ml) (1½ gm) salt
2 tablespoons (30 gm/1 oz) frozen grated butter (or a combination of lard and butter)
approximately ½ cup (120 ml) cold milk
optional 1 tablespoon milk, for glazing the tops of the scones

Directions:
1. Preheat oven to very hot 475°F/240°C/gas mark 9.
2. Triple sift the dry ingredients into a large bowl. (If your room temperature is very hot refrigerate the sifted ingredients until cold.)
3. Rub the frozen grated butter (or combination of fats) into the dry ingredients until it resembles very coarse bread crumbs with some pea-sized pieces if you want flaky scones or until it resembles coarse beach sand if you want tender scones.
4. Add nearly all of the liquid at once into the rubbed-in flour/fat mixture and mix until it just forms a sticky dough (add the remaining liquid if needed). The wetter the dough the lighter the scones (biscuits) will be!
5. Turn the dough out onto a lightly floured board, lightly flour the top of the dough. To achieve an even homogeneous crumb to your scones knead very gently about 4 or 5 times (do not press too firmly) the dough until it is smooth. To achieve a layered effect in your scones knead very gently once (do not press too firmly) then fold and turn the kneaded dough about 3 or 4 times until the dough has formed a smooth texture. (Use a floured plastic scraper to help you knead and/or fold and turn the dough if you wish.)
6. Pat or roll out the dough into a 6 inch by 4 inch rectangle by about ¾ inch thick (15¼ cm by 10 cm by 2 cm thick). Using a well-floured 2-inch (5 cm) scone cutter (biscuit cutter), stamp out without twisting six 2-inch (5 cm) rounds, gently reform the scraps into another ¾ inch (2 cm) layer and cut two more scones (these two scones will not raise as well as the others since the extra handling will slightly toughen the dough). Or use a well-floured sharp knife to form squares or wedges as you desire.
7. Place the rounds just touching on a baking dish if you wish to have soft-sided scones or place the rounds spaced widely apart on the baking dish if you wish to have crisp-sided scones. Glaze the tops with milk if you want a golden colour on your scones or lightly flour if you want a more traditional look to your scones.
8. Bake in the preheated very hot oven for about 10 minutes (check at 8 minutes since home ovens at these high temperatures are very unreliable) until the scones are well risen and are lightly coloured on the tops. The scones are ready when the sides are set.
9. Immediately place onto cooling rack to stop the cooking process, serve while still warm.

warabiiiiii mochiiii, ikaga desuka ? Japanese Summer’s snack

A plate of warabi mochi, a long time favorite Japanese sweet. There are still people with wood carts that they roll, or more often these days small vans, that pass in residential towns at the hour of tea break. They shoot “warabiiiiii mochiiii….” to call customers. Kids, older kids rush out of their houses to buy some.

1.catch a bit with the pick

2. Roll it in a mix of kinako and sugar (or kinako and kuro mitsu black sugar syrup)

3. Guess !
I really don’t know. Maybe it’s decorative. Or they give them to the cat.
I ate them. All. Mmmmmm ! It’s delicious, fresh and nutty, not too sweet (you may skip the sugar).

Well, there was a point zero.
0. Mix about 30 g (2/3 tbs) of warabi-ko (bracken starch) and a cup of water. Cook while stiring with a wooden spatula. First you have a white liquid, then a white paste, then a transparent paste (avoid doing it in a white sauce pan). When it’s all clear, shape balls and throw in iced water -not easy, you should train a lot to become a pro.
Short-cut : tranfer all the paste into a wet mold, let cool 1-2 hours. They can be chilled in the fridge, or -more traditional- at room temperature. Before serving, cut in cubes in a plate of water as you want them wet.

Kinako is powdered grilled soy bean. I use natural cane sugar. Half/half is classic. For me 20% sugar is enough.

So if you can get warabi starch and kinako from you local Asian store, try that some hot day.

other Japanese sweets